Discover a professional 3D printing powder supplier

(Nozzle Know-How: A Step-by-Step Guide to Changing Your 3D Printer Nozzle)
Title: “Revolutionizing Your 3D Printing: The Ultimate Nozzles Guide”
(Nozzle Know-How: A Step-by-Step Guide to Changing Your 3D Printer Nozzle)
Are you tired of struggling with your 3D printer’s nozzle? Are you searching for that elusive goldilocks zone where prints come out perfectly every time? Well, look no further! In this blog post, we’ll explore everything you need to know about changing your 3D printer nozzle, including step-by-step instructions and tips to ensure your prints come out like a professional.
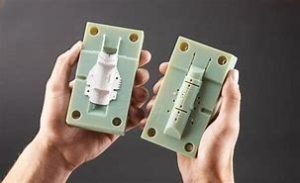
First off, let’s define what a nozzle is. A nozzle is a small, adjustable part located at the end of a print head, responsible for pushing ink or other printing materials into the printer bed during each print cycle. Different types of nozzles have different functions, so it’s important to choose the right one for your specific needs.
One of the most common types of nozzles used on 3D printers is the flatbed nozzle. These nozzles are designed to be flexible and easy to install, making them ideal for printing objects with intricate shapes and details. They also come in various sizes, allowing you to print delicate objects or large, complex geometries with ease.
Another type of nozzle is the TPU ( Thermoplastic rubber) nozzle. These nozzles are designed to work well with TPU-based materials such as polycarbonate and nylon, and they provide excellent coverage and support for your prints. They’re also easy to install and maintain, making them a popular choice among 3D printer enthusiasts.
Now, let’s dive into the step-by-step guide to changing your 3D printer nozzle. Here are the basic steps:
1. Open your printer and locate the nozzle that needs to be replaced.
2. Remove the old nozzle by lifting the(screwdriver or lever).
3. Apply a drop of lubricant or oil to the threads of the new nozzle, making sure it’s securely attached.
4. Slide the new nozzle onto the axis and screw it into place using the provided screws.
5. Test the new nozzle by printing a few test objects to make sure it’s working correctly.
If you’re still having trouble changing the nozzle, there are some additional tips to keep in mind:
1. Be careful when removing the old nozzle. You don’t want to damage the threads or the machine.
2. Make sure to apply enough lubricant or oil to prevent friction and ensure a smooth connection between the nozzle and the printer axis.
3. Don’t overtighten the screws when installing the new nozzle. This can cause the nozzle to break or get damaged.
4. If you’re not comfortable changing the nozzle yourself, consider seeking help from a friend, family member, or online community.
(Nozzle Know-How: A Step-by-Step Guide to Changing Your 3D Printer Nozzle)
In conclusion, changing your 3D printer nozzle can be a daunting task, but it doesn’t have to be. By following these simple steps and taking some extra care, you can ensure that your prints come out perfectly every time. And if you’re still struggling, don’t hesitate to seek help from a professional or online community for guidance and support. Happy printing!Inquiry us if you want to want to know more, please feel free to contact us. (nanotrun@yahoo.com) hot tags: 3d printing,3D printiner,3d printing material

(Nozzle Know-How: A Step-by-Step Guide to Changing Your 3D Printer Nozzle)
RELATED POSTS
Material Matters: What Kinds of Materials Do 3D Printers Use Beyond Plastic?

what 3d printing material is the most flexible
3D Printing: Leading Human beings to Explore the Micro World in Various Fields
Inspire Your Next Project: Creative Ideas for Your 3D Printer
What Is SLA 3D Printing? Technology Explained