


(Precision in Motion: Printing Complex Moving Parts with FlashForge 3D Printers)
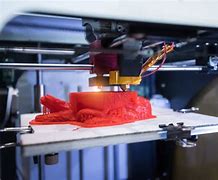
The world of precision printing has never been more vibrant than ever before. With the rise of 3D printing technology, it is now possible to create complex moving parts with ease, making it an indispensable tool for many industries. But do you know how to master precision in motion with flashforge 3D printers? In this guide, we'll take you on a journey through the process, covering everything from the basics to advanced techniques. Step 1: Understanding the Basics of FlashForge 3D Printers Before diving into the steps of mastering precision in motion with flashforge 3D printers, let's understand some basic concepts. Flashforge 3D printers use high-speed, cutting-edge technologies to create precise, customized models. They consist of three main components: a head, arm, and a printer body. The head designs and the on the printer body, while the arm moves over them to deliver the final product. The printer body includes all the necessary machinery for the printing process, including the heating system, cooling system, and other equipment. Step 2: Choosing the Right Machine When choosing a flashforge 3D printer, consider your specific needs. Do you need a powerful machine that can handle complex or are you looking for something more affordable? Also, make sure the printer meets your budget and works well with your current layout and design. Step 3: Setting Up Your Computer and Software To start using flashforge 3D printers, you first need to set up your computer and software. You will need a good computer with fast storage and sufficient processing power, and you may need to purchase additional software such as a metal guidebook, bar code scanner, or file converter. Step 4: Applying Hardware to the Computer Once your computer is set up, you can begin applying hardware to the printer. You may need to install a various types of components depending on the type of printer you're using, including printing heads, arms, and hardware modules. Step 5: Modeling Your with FlashForge 3D Systems Now it's time to get started modeling your with flashforge 3D systems. You can choose from a variety of models available online or at local print shops, and these models can help you plan out the details of your. Step 6: Using Software to Control the Print Process With your model in place, you can start using software to control the printing process. This software allows you to adjust settings such as temperature, speed, and ink flow, and it also allows you to add custom elements such as text, symbols, or animations. Step 7: Testing and Debugging Your Prints Finally, it's time to test and debug your prints. You can use the built-in debugging tools provided by your printer to identify issues such as jamming, uneven printing, or runtimes. If you find any problems, you can seek assistance from the manufacturer or technical support team.
(Precision in Motion: Printing Complex Moving Parts with FlashForge 3D Printers)
In conclusion, mastering precision in motion with flashforge 3D printers requires dedication, practice, and a good understanding of the technology. By following the above steps, you can build an effective and efficient print workflow that helps you create complex moving parts quickly and accurately.


